Interface description
Upon opening, QGis uses the parameters stored into the QRex file (a QGis project file)
By default some layers are present into the project, although of course they are empty at the beginning, and the user has the possibility to modify the list of layers.
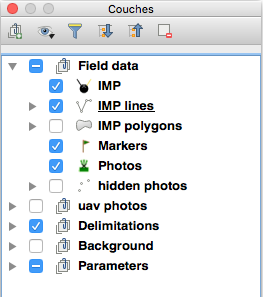
Layers in QRex
They are organized in groups :
- The group of field markers:
- IMP: the main "Indicator of Mine Presence" (or Absence) layer. It is a point layer, meaning that any object located on the field will be represented by a point symbol.
- IMP-line: Indicators can be represented as lines (trenches, roads, walls, …). The geometry used for these is a line string.
- IMP-polygon: for Indicators delineated as polygons, like terrain features.
- Markers: a point layer for markers that are not Indicators related to mines like the IMPs but to landmarks, warning signs, and so on.
- Photos: a point layer storing the location where photos were made on the field and presenting these photos.
- hidden photos: same as previous but normally containing photos hidden from the canvas, to not clutter up the display
- The group of Area delimitation:
- Areas: a polygon layer displaying the areas of interest for the data collection or the demining activities.
- The user is free to add any kind of delimitations available (like administrative delimitations, for instance)
- Background group: here background images or map servers can be inserted, depending on the needs, like aerial images, road network, land cover, OpenStreetMap, and so on.
- Parameters group: here are all the parameters tables needed for QRex. Do not remove them unless you know what you are doing. These tables are editable directly in QGis if the user has the privileges to do so, according to the user accounts in the database.
Data storing
The data collected with QRex are stored in the TRS database (see licence and installation). The additional data, like background images, delimitations or other pre-existing data can be stored in the database or provided by other sources. When opening the project, the data present in the database are displayed in the window canvas.
Positioning
The geo-localisation can be achieved in two ways:
- With a GPS device connected to the computer or contained in the computer. In this case the connection has to be activated on a layer in 'edit' mode with the relevant menu (see QGis doc for the settings).
- With a background image, like an aerial photo or a connection to a map server. In this case toggle the layer that will receive the data in edit mode and point with the cursor where the object is located on the image.
Some basic QGis tools

Recording new data
Lets suppose that the user finds an IMP (Indicator of Mine Presence) and would like to store its description and position.
- Select the layer in the layer list (example, the IMP layer, see figure 1)
- Toggle the Edit mode
- Select the tool 'Add an entity'
- Point inside the canvas to the IMP location, then a form opens up
- Fill in the form
- Save
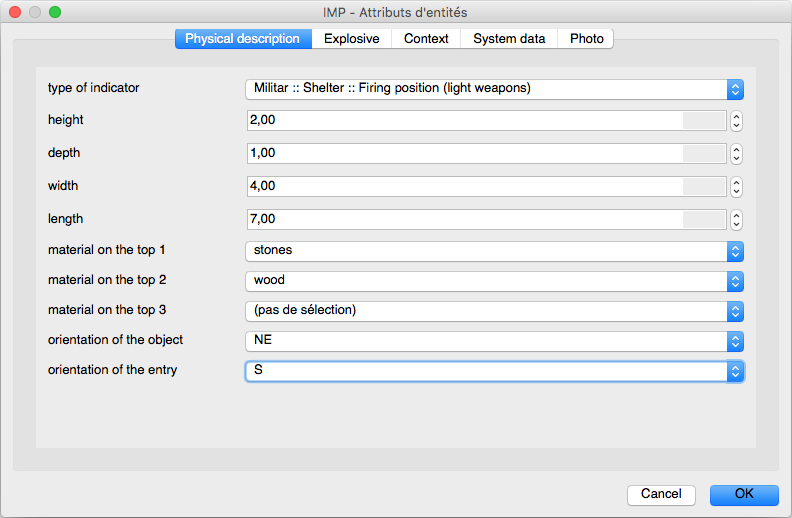
Figure 2. A form to describe an IMP in QRex.
At that moment the data are saved in the database and a symbol is produced according to the object description. Objects get a unique id number, metadata are generated. See examples on figure 3:
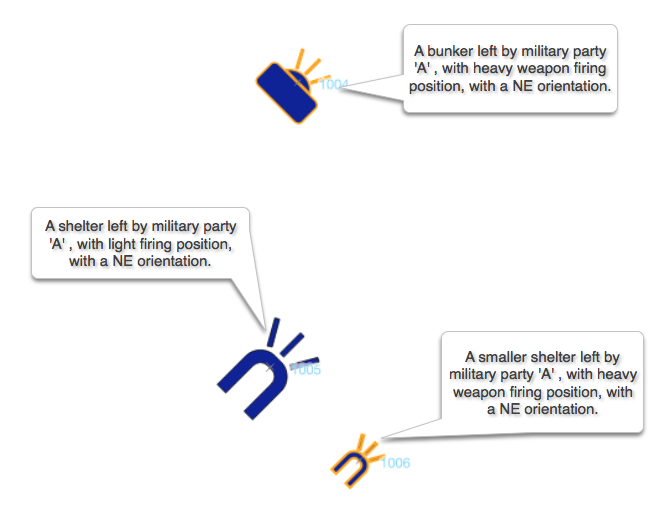
Figure 3. Symbols of IMP as produced by QRex.
Only the Type of indicator and the 'positioning source' are mandatory here.
Several object can be recorded in the same time but is wise to save each entity individually.
The process is the same for the other IMP geometries, and for the field markers, each with their respective layer.
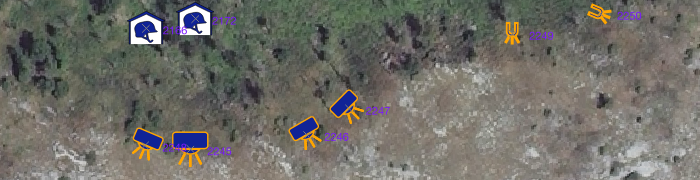
A photo location can also be placed on the map, by using the 'Photo' layer exactly the same way as for the IMP, but in this case it is also mandatory to specify the type of photo and which object is represented, should this be an IMP, a field marker or an area. The photo file itself is associated to the record by navigating to from the form. The symbol of the photo will then be orientated toward this object. There is no limit as for the number of photos by object and the main photo (by default the first one) will appear in the object form. See Figure 4.
The photo file has to be on the computer before to record it, which means that there is a need to have set up an automatic transfer between the camera and the computer, or to insert the photo card into the computer. This may depend on an additional tool. The easiest way to achieve this transfer is to use a smartphone and have the computer generate a local wifi itself to which the smartphone can then connect. Numerous application exist to do so and transfer the photos automatically.
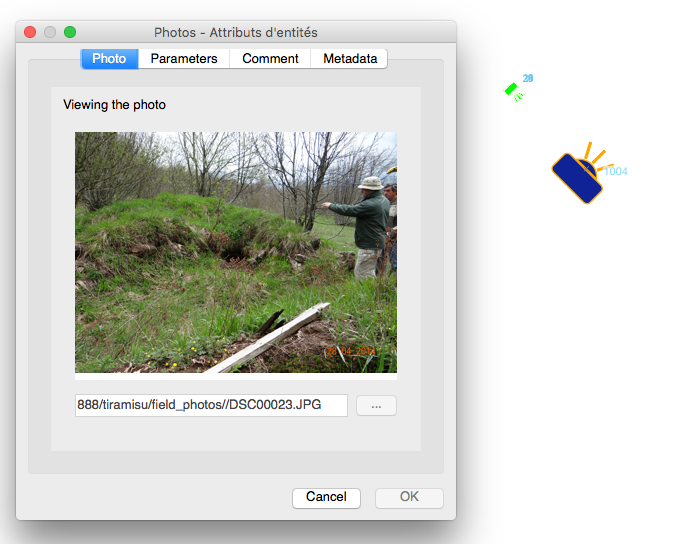
Figure 4. A photo of an Imp in a QREX form.